If you’ve read our guide to starting a vegetable garden from scratch, you already know that working organic matter into your soil is one of the most reliable ways to improve it. Compost is that organic matter, made at home from things you’d otherwise throw away. You don’t need special equipment or a science background to make it — you need a spot for a pile or bin, a rough mix of two kinds of material, and a little patience.
This guide walks through what composting actually is, what to put in (and leave out of) your pile, roughly how long it takes, and how to use the finished product in your garden, based on guidance from the EPA and university extension services.
What Composting Actually Does
Composting is the natural breakdown of organic material — food scraps, yard trimmings, and similar plant-based waste — by microorganisms, into a dark, crumbly soil amendment. According to the EPA, composting at home involves “minimal effort, equipment, expense, and expertise,” and the payoff is a free source of organic matter for your garden instead of sending that material to a landfill.
Greens and Browns: The Basic Ingredients
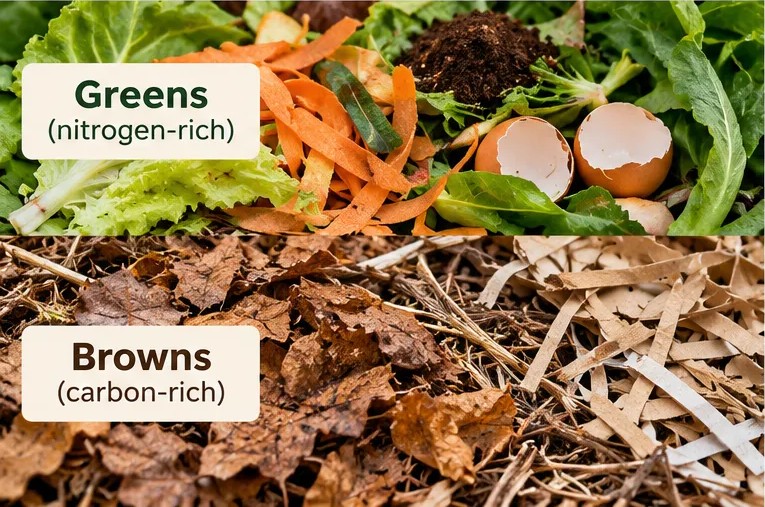
Every compost pile is built from two broad categories of material, and getting the balance roughly right is the single most useful thing to understand before you start.
- Greens (nitrogen-rich): fruit and vegetable scraps, grass clippings, coffee grounds and paper filters, paper tea bags (no staples), and crushed eggshells
- Browns (carbon-rich): dry leaves, plant stalks and twigs, shredded paper (non-glossy, uncolored) and shredded brown bags, shredded cardboard (no wax coating, tape, or glue), and untreated wood chips
The EPA’s practical guidance for home composters is to add at least two to three times the volume of browns to the volume of greens. In plain terms: for every bucket of food scraps or grass clippings you add, mix in two to three buckets of dry leaves, shredded paper, or similar dry material. You’re eyeballing volume here, not weighing anything.
Why the Ratio Matters (Without Needing to Measure It)
Behind the greens-and-browns split is a chemistry concept called the carbon-to-nitrogen (C:N) ratio — the microorganisms doing the actual decomposition need both carbon (mostly from browns) and nitrogen (mostly from greens) to work efficiently. University extension sources commonly cite an ideal C:N ratio for active composting somewhere in the range of roughly 25:1 to 30:1. That said, this is a different measurement than the EPA’s browns-to-greens volume ratio above, and as a beginner you don’t need to calculate or measure a C:N ratio yourself — following the volume-based greens-and-browns guidance gets you into a workable range without any math.
The EPA also recommends keeping your pile’s moisture at roughly the consistency of a wrung-out sponge — damp enough to clump slightly, but not dripping. Too dry and decomposition slows down; too wet and you risk the smell and sliminess covered further down.
Choosing a Way to Compost
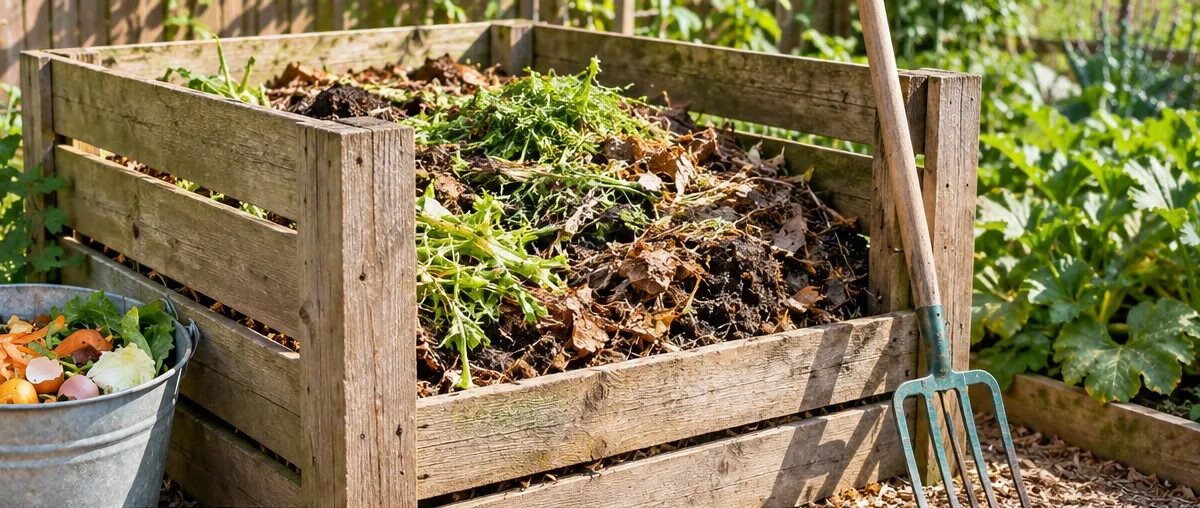
The EPA describes two broad approaches to composting at home: backyard composting and vermicomposting (worm composting). Backyard composting is the pile-based process this guide focuses on, and within it, the EPA notes you can leave your pile open or choose to contain it in a bin — “bins can be constructed from materials such as wire, wood, and cinder blocks,” and can also be “enclosed” in the form of barrels or tumblers. These are containment choices within the same greens-and-browns process, not separate composting methods, and the right one for you comes down to how much space you have and how hands-on you want to be.
Vermicomposting is the EPA’s other listed approach, and works differently: worms do the breaking-down of food scraps, and it can work in a smaller space than a traditional backyard pile.
Getting Started: Where to Put It and How to Collect Scraps
For kitchen scraps, the EPA suggests you “collect and store your fruit and vegetable scraps in a closed container on your kitchen counter, under your sink, or in your fridge or freezer” until you’re ready to add them to your pile — you don’t need to run out to the yard every time you trim a vegetable.
For the pile or bin itself, the EPA recommends choosing “a space in your yard for your compost pile that is easily accessible year-round and has good drainage,” avoiding placement “right up against a fence,” and making sure “there is a water source nearby” so keeping the pile appropriately moist is easy. On the question of sun versus shade, the EPA is direct: “your compost pile will break down in sun or shade,” so this isn’t something you need to over-think when picking a spot.
Building and Turning Your Pile
Once you’ve picked a location and method, the EPA’s guidance for building the pile is to start with “a four- to six-inch layer of bulky browns” at the base — this helps with airflow and drainage from the ground up — and then continue adding material in that roughly two-to-three-parts-browns-to-one-part-greens volume, keeping an eye on moisture as you go.
From there, the EPA notes that turning and mixing your pile from time to time will help speed up the decomposition process and aerate the pile. Turning isn’t strictly required — an untouched pile will still break down eventually — but it’s the main thing you can do to move things along faster, since it gets oxygen to the microorganisms doing the work.
What Not to Compost
The EPA’s current guidance for home composting specifically advises against adding the following, either because they attract animals, don’t break down well in a backyard-scale pile, or introduce other problems:
- Meat, fish, and bones
- Cheese and dairy products
- Fats, oils, and grease
- Cooked food (the EPA notes small amounts are acceptable)
- Compostable foodservice ware and compostable bags
- Herbicide-treated plants and grass
- Aggressive weeds or weeds that have gone to seed
- Diseased or pest-infested plants
- Treated or painted wood
- Pet waste and cat litter
- Dryer lint
- Glossy paper
- Produce stickers
A few of these are easy to overlook — the produce stickers on fruit and dryer lint in particular are things people commonly assume are compostable when they aren’t, at least for a typical backyard pile.
If you’re pulling plants because of insect damage and aren’t sure what caused it, our guide to common vegetable garden pests can help you identify the culprit.
How Long Composting Takes
There isn’t one single answer here, and the two most directly comparable sources we found — the EPA and Iowa State University Extension — give somewhat different numbers, each tied to their own description of what “well-managed” means:
- The EPA states that “compost in a well-maintained pile will be finished and ready for use in about three to five months,” and that “left untended, a pile may take a year to decompose.”
- Iowa State University Extension states that “a well-managed compost pile (one that is watered and turned regularly) containing a mixture of shredded plant material should be ready in two to four months,” while a pile made of unshredded materials and left unattended “may take a year or longer to decompose.” They add that a pile started in fall typically won’t finish until early summer the following year, while one started in spring is generally ready by mid-to-late summer.
Rather than treating either number as an exact countdown, it’s more useful to take away the general pattern both sources agree on: the specific timeline depends on your materials (shredded versus not), how actively you manage the pile (watering and turning versus leaving it alone), and the season you start in.
Troubleshooting: Smell and Slow Decomposition
Two problems account for most beginner composting frustration, and both usually trace back to the same underlying issue — not enough oxygen reaching the pile.
- A rotten or septic smell generally means the pile has gone anaerobic, often because it’s too wet or too compacted. Turning the pile to reintroduce air, and mixing in more dry browns to soak up excess moisture, are the standard fixes.
- An ammonia-like smell points to too much nitrogen relative to carbon. Colorado State University Extension attributes this specifically to “too much nitrogen (low C:N ratio)” — in practice, too much green material relative to browns — and recommends the same fix: mix in more brown materials.
- The pile isn’t breaking down: this is commonly a sign that the greens-to-browns balance, moisture, or turning frequency needs adjusting — the same three factors that govern how well the pile works in the first place.
In other words, the troubleshooting toolkit is really just the same handful of levers covered above: adjust the browns-to-greens balance, check moisture, and turn the pile.
Using Finished Compost in Your Vegetable Garden
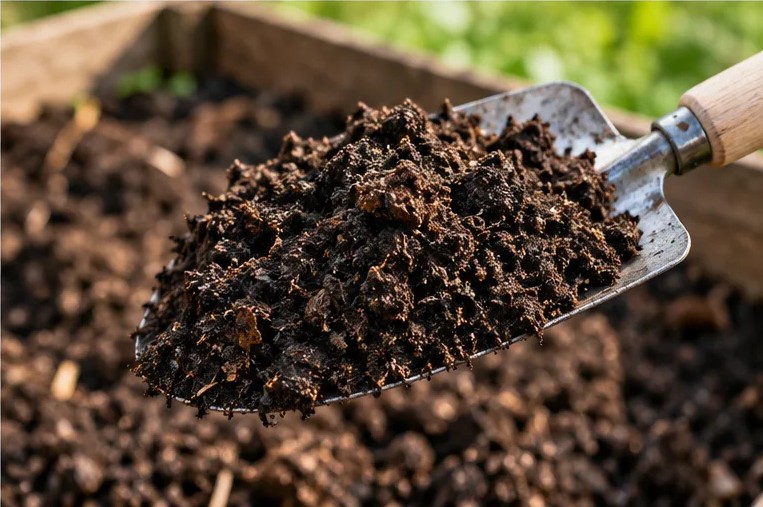
The EPA’s guidance for knowing when compost is ready starts before you even look at it: once your pile is “no longer heating up after mixing” and there are “no visible food scraps,” let it cure, or finish, for at least four weeks. At that point, finished compost “will look dark, loose, and crumbly and smell like fresh soil,” with most or all of the original materials no longer recognizable. The EPA describes two common ways to apply it:
- As a soil amendment: mix two to four inches of compost into the top six to nine inches of soil
- As mulch: add a three-inch layer of compost on the surface, keeping it a bit away from direct contact with plant stems
If you’re working with the small first-season garden we described in our beginner’s vegetable garden guide, working finished compost into your soil before planting is one of the more reliable ways to build up the organic matter that guide recommends testing for.
Common Mistakes to Avoid
- Adding meat, dairy, or fatty food scraps, which attract animals and don’t break down well in a typical backyard pile
- Assuming everything labeled “compostable” belongs in a home pile — compostable foodservice ware and bags are specifically called out by the EPA as items to avoid in backyard composting
- Letting the pile get too wet without adding browns, which leads to the anaerobic smell described above
- Never turning the pile and then being surprised that it’s taking a long time to break down
Frequently Asked Questions
Do I need a special bin to start composting?
No. An open pile works, as long as you have the yard space for it; bins, tumblers, and vermicomposting setups are alternatives suited to different amounts of space and hands-on effort, not a requirement.
How do I know my compost is finished?
Per the EPA, once your pile stops heating up after mixing and no food scraps are still visible, let it cure for at least four weeks. Finished compost should then look dark, loose, and crumbly, smell like fresh soil, and have most or all of the original materials no longer recognizable.
My compost smells bad — what’s wrong?
A rotten smell usually points to an anaerobic pile that’s too wet or compacted; turning it and adding more dry browns are the standard fixes. An ammonia smell suggests too much green material relative to browns.
I don’t have a yard — can I still compost?
Vermicomposting (worm composting) can work in a smaller space than a traditional pile. If you’re gardening in containers on a balcony, our guide to balcony and container vegetable gardening covers container-specific soil considerations as well.