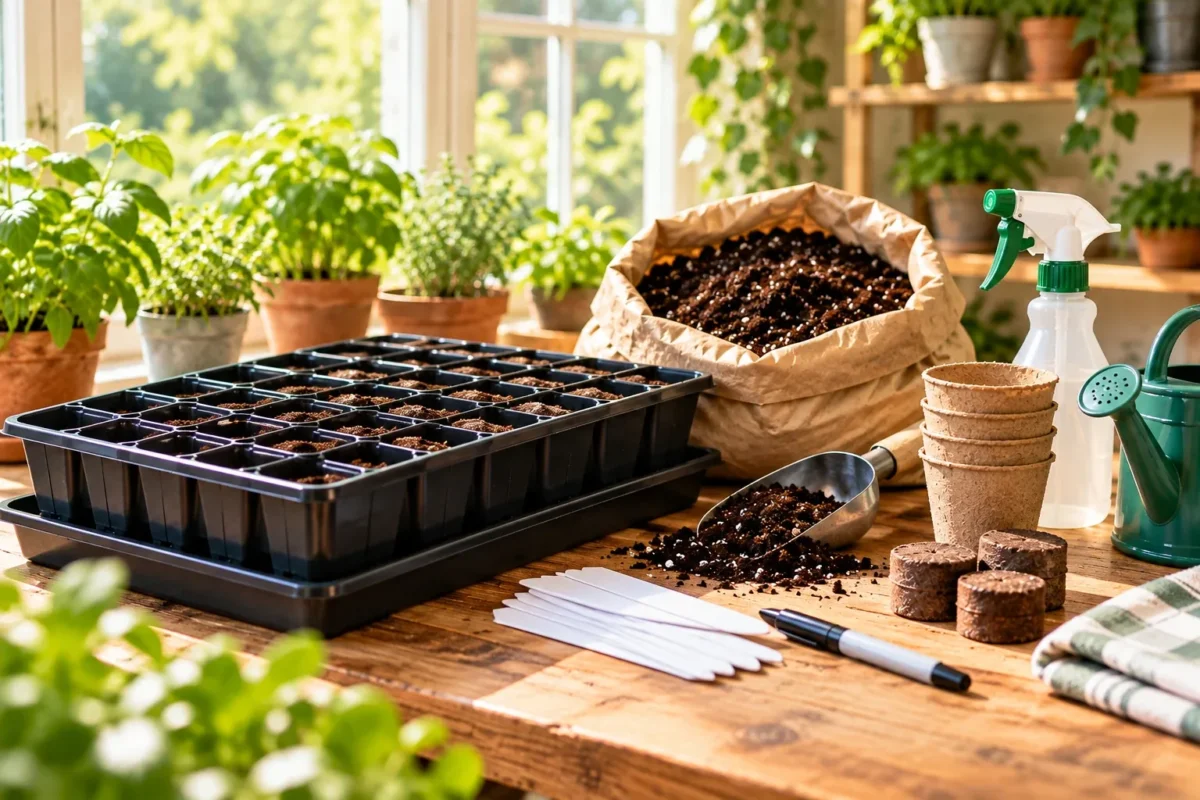
Walk into a garden center in late winter and you’ll find a whole aisle of seed-starting gear: trays, domes, heat mats, pellets, light stands, and kits that bundle several of these together. Some of it makes seed starting easier. Some of it you’ll never miss.
This guide sorts common seed-starting supplies into three groups: what you really need, what helps in certain situations, and what you can skip or substitute. It’s based on guidance from university Extension programs, and it focuses on choosing equipment. For the step-by-step process of sowing and caring for seedlings, see our guide on how to start vegetable seeds indoors.
The Short List: What You Really Need
Utah State University Extension lists the basic materials for starting seeds indoors as seeds, containers, soilless mix, lights, water, fertilizer, a heat source, fans, labels, and a growing space. Not all of those are equally essential, and your home’s conditions decide which ones matter most.
| Category | Item | Why | When the rule changes |
|---|---|---|---|
| Must-have | Containers with drainage holes | Waterlogged mix rots roots (Utah State, UMN) | Soil blocks replace containers, but they need a blocking tool and a tray for bottom watering (Iowa State) |
| Must-have | Soilless seed-starting mix | Lightweight and usually disease-free (Utah State, Iowa State) | — |
| Must-have | Enough light | Seedlings in dim light tend to get tall and spindly (Iowa State, UMN) | For a few plants, UMN says a south-facing window may be all you need. For full trays, plan on an electric light |
| Must-have | A gentle way to water | Avoids washing seeds or mix out of the containers (UMN, Iowa State) | — |
| Must-have | Labels | Keep track of what’s in each cell or pot (Utah State, UMN) | — |
| Helpful | Humidity dome or clear plastic | Keeps moisture in during germination (Utah State, Iowa State) | Comes off when seedlings emerge; see the dome section for each university’s timing |
| Helpful | Plug-in timer | Turns lights on and off automatically (UMN, Utah State) | Needed only if you use electric lights |
| Helpful | Heat mat with a thermostat | Warms the mix for germination (Utah State, Iowa State) | Often unnecessary in a warm room; most useful for warm-season crops in a cool room |
| Helpful | Small fan | Air movement strengthens stems and can curb disease (Utah State) | Utah State lists it as optional |
| Helpful | Thermometer | Lets you check the mix temperature (Utah State) | Useful mainly if you’re deciding whether you need a heat mat |
| Skip or substitute | Light stands and carts | Iowa State calls them “rather expensive” | A standard fluorescent or LED fixture works |
| Skip or substitute | Special “grow lights” | Utah State and Iowa State say they aren’t necessary | Shop lights work for seedlings |
| Skip or substitute | Mixing your own seed-starting mix to save money | Utah State: “do not expect to save money” | Worth trying if you want a custom mix, not for savings |
| Skip or substitute | New trays every year | Cleaned and disinfected trays can be reused (Iowa State, UMN) | Replace trays that are cracked or brittle |
The rest of this guide explains each group in more detail.
Containers: Cell Trays, Pots, and Soil Blocks
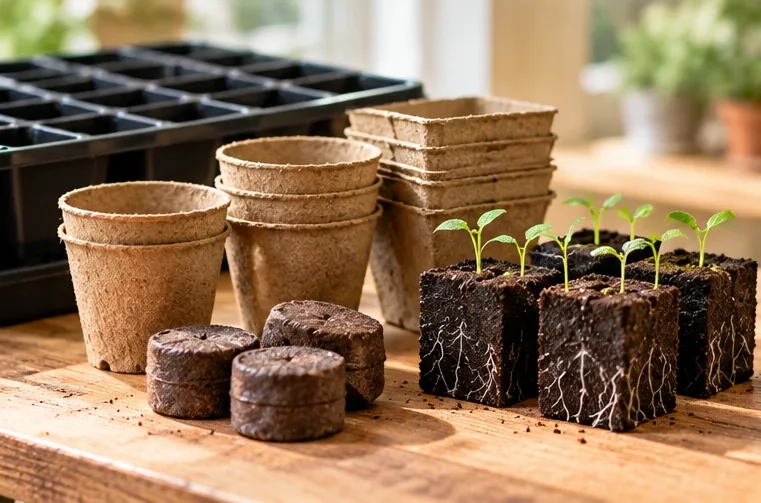
Whatever container you choose, two rules apply. University of Minnesota Extension says that “all seed-starting containers must have drainage holes at the bottom.” It also recommends divided containers with one seedling each, because roots of seedlings sown together “will grow into each other and are likely to be injured later during transplanting.”
Cell Trays and Flats
Cell trays (also called inserts or cell packs) sit inside an outer tray, or flat. Utah State notes that inserts with up to 288 cells exist, but those high-count inserts “require increased care and specialized equipment” because the small cells dry out quickly. For home growers, Utah State says common insert sizes are 36, 48, or 72 cells per flat.
What to look for:
- Cell count that matches your space and crops. Fewer, larger cells hold more mix and dry out more slowly. Higher counts fit more seedlings but need more frequent watering and earlier transplanting, according to Utah State.
- Drainage holes in every cell.
- A solid tray underneath if you plan to bottom water.
- Durability. Utah State notes that most plastic trays and inserts are single-use, but some can be reused for several years.
Open flats without cells also work, especially for onions and leeks, which UMN says can be started in one larger flat. For most crops, though, Utah State notes that roots in open flats “often grow together” and must be teased apart carefully at transplanting.
Peat Pots, Paper Pots, and Peat Pellets
Plantable pots, made of peat, paper, or other fibers, are designed to go into the ground with the seedling. They’re most useful for crops that dislike root disturbance. UMN and Utah State both mention cucumbers and squash, and Utah State adds melons.
They do have trade-offs:
- They can dry out faster. Utah State notes that these containers “may also dry out quicker, necessitating more frequent irrigations.”
- They may not break down quickly. Utah State says that in its dry climate, they “often do not degrade quickly enough.”
- Exposed edges wick water away. Iowa State advises removing the top portion or burying the entire pot, since any part above ground can cause the soil around the plant to dry out. UMN recommends trimming the pot collar to soil level and tearing holes in the bottom to help roots spread.
Compressed peat pellets expand when watered. Utah State’s advice is to keep them “moist but not soggy” and handle them gently.
Recycled Containers
Iowa State lists many household containers that can work, including yogurt cups, plastic or foam drinking cups, clamshell containers, and milk jugs cut in half. Its guidance is that the container should hold germination mix about 3 inches deep and have drainage holes poked in the bottom.
Recycled containers come with caveats:
- Drainage and structure vary. Utah State notes that options like cut-up cardboard egg cartons or toilet paper rolls “may not provide optimal drainage or structure,” and suggests experimenting before relying on them for important seeds.
- Not everything is plantable. Iowa State says cardboard tubes and paper egg cartons can be planted, but exposed edges will wick moisture away. Styrofoam egg cartons don’t break down, so seedlings have to be removed before planting.
Soil Blocks
Soil blocking skips containers entirely. A hand tool presses moist mix into firm cubes, and seeds are sown directly into the blocks.
Advantages, according to Iowa State:
- Roots stop at the edge of the block, so they don’t circle and transplant with little shock.
- No plastic containers to buy or throw away.
- You make exactly as many blocks as you need.
Limitations, also from Iowa State:
- You have to buy a soil-blocking tool.
- Blocks may fall apart until you get the mix and moisture right.
- The exposed sides dry out faster, so blocks need more frequent watering, and they should be bottom watered so they don’t break apart.
- Very small seeds can be tricky unless you use a micro-blocker.
Iowa State says standard handheld blockers typically make 1½- to 2-inch blocks, and that the best place to start is a premade mix intended for soil blocks. Soil blocks can be a good fit if you want to cut plastic use. Because of the learning curve Iowa State describes, cell trays may be simpler for a first season.
Reusing Trays: Clean and Disinfect Them First
Disease-causing organisms can survive in used containers, so clean and disinfect them before each use. Iowa State’s container-cleaning guide describes these steps:
- Brush off loose soil.
- Wash the containers in soapy water and rinse.
- Soak them for at least 10 minutes in a solution of one part household bleach to nine parts water, then rinse.
UMN suggests a longer soak, 30 minutes, in bleach or another disinfectant mixed “to the strength recommended on the label for disinfecting surfaces.” Utah State gives the same 10% bleach strength and also mentions quaternary ammonium products.
Bleach safety:
- Follow the product label, including any protective gear it calls for. The CDC gives the same advice for household bleach.
- Work with good ventilation. The CDC recommends good ventilation when using bleach indoors.
- Never mix bleach with other cleaners or disinfectants. The CDC warns that mixing can release vapors that are dangerous to breathe.
- Add bleach to water, not water to bleach, to avoid splashing, and protect your skin and clothing (Iowa State).
- Use the solution within two hours of mixing it, and rinse the containers before use (Iowa State).
Utah State also notes that bleach can make plastic more brittle over time, so expect to replace well-used trays eventually.
Seed-Starting Mix (and Why Not Garden Soil)
Seed-starting mix is the one supply where buying the right product matters most. Iowa State says the germination medium “should be lightweight, porous, and free of pathogens,” and recommends commercially prepared soilless mixes.
What to look for on the bag:
- “Seed-starting” or “seed” or “plug” mix. Utah State suggests choosing mixes blended for starting seeds, sometimes called seed or plug mix.
- Peat moss or coconut coir as the base. Utah State says these give “adequate drainage and moisture retention.” Common additives include vermiculite and perlite.
- A fine texture. Utah State advises avoiding mixes with larger wood chips for starting seedlings.
Avoid garden soil. UVM Extension says it’s “too heavy for germinating seeds in containers.” Our seed-starting guide explains why soilless mixes also help prevent damping-off.
Making your own mix is possible. Utah State gives a basic recipe of equal parts peat moss, perlite, and/or vermiculite, but adds that you should “not expect to save money.”
Heat Mats: When They Help
Whether you need a heat mat depends mostly on how warm your mix stays.
Check Your Room First
Iowa State says most seeds germinate best when the mix is “consistently 70 to 75 degrees Fahrenheit,” and that placing containers in a warm spot in the house “usually works fine.” It suggests heating mats or cables for cool environments.
Keep in mind that the mix can be cooler than the room. UMN notes that the temperature in indoor containers “can be as much as 5 degrees Fahrenheit lower than indoor air temperatures.” Utah State suggests checking soil temperature with an inexpensive kitchen thermometer before deciding.
Which Crops Benefit Most
Warm-season crops benefit most from a heat mat. Iowa State’s germination table lists these ideal germination temperatures:
| Crop | Germination temperature (Iowa State) |
|---|---|
| Tomato, pepper, eggplant | 70–75°F |
| Broccoli | 65–70°F |
| Lettuce | 60–70°F |
Utah State notes that heat mats “will likely be needed if the room is cooler and you want to grow warm-season crops.” Lettuce and other cool-season crops germinate at lower temperatures, so a heat mat matters less for them. Check the seed packet for the crops you’re growing.
What to Look For in a Heat Mat
- A thermostat. Utah State recommends connecting a thermostat to the heat mat “so seed containers do not get too hot.”
- A size that fits under your trays.
- A separate outlet from your lights. UMN warns: “If you use a timer for lights above the seedlings, don’t plug the heat mats into it.”
Humidity Domes and Watering Tools
Humidity Domes (or Plastic Wrap)
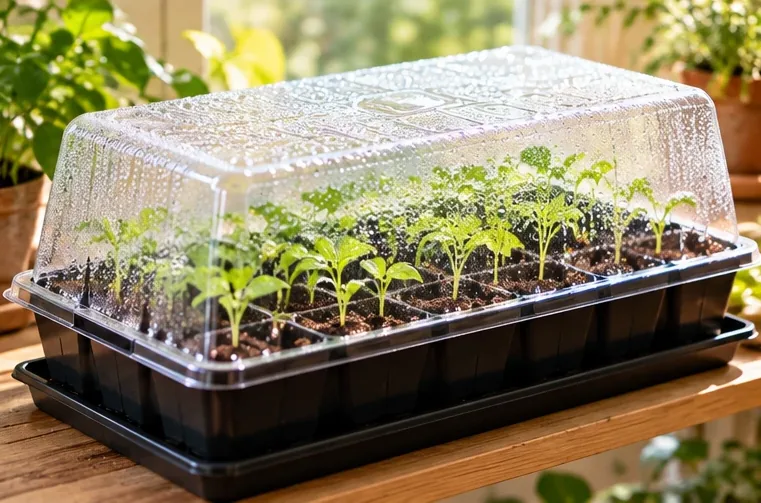
Heavy condensation like this is a sign to vent or lift the dome. Most sources say to remove it once seedlings emerge.
Clear covers help keep the mix evenly moist while seeds germinate. Utah State says humidity domes “can boost your seed germination success” and reduce watering needs. Many seed-starting kits include one, but Utah State and Iowa State both say clear plastic bags or plastic wrap work too.
Universities describe slightly different times to remove the cover:
| Source | When to remove the cover |
|---|---|
| Utah State | Once seedlings emerge, to prevent fungal diseases and leggy growth |
| UVM Extension | Once seedlings emerge. Before that, remove or vent the cover if condensation appears, because too much humidity can cause seeds to rot |
| UMN | When the seedlings are tall enough to touch the dome |
In short, most of these sources say to take the cover off when seedlings emerge. UMN gives a later point, when seedlings touch the dome. Whichever timing you follow, watch for heavy condensation or mold, which UVM treats as a sign to vent the cover.
What to look for: a dome that fits your tray and is easy to lift or vent, since you may need to let in air if condensation builds up.
Watering Tools
Seeds and tiny seedlings wash out easily, so a gentle watering method matters more than any particular product:
- A spray bottle. UMN suggests misting the surface gently, but cautions that it’s easy to wet the top while the rest of the container dries out.
- A rubber bulb sprinkler. Iowa State calls it “a handy watering aid” that “produces a gentle spray that won’t dislodge the seedlings or wash away the potting mix.”
- Bottom watering. Set containers in a tray or basin of water and let the mix absorb it through the drainage holes (Utah State, UMN). UMN adds that you should drain any water left in the tray afterward to keep roots healthy.
If you plan to bottom water, buy outer trays without holes.
Labels, Timers, Fans, and Other Small Things
- Labels. Utah State suggests writing in pencil, which it says holds up best in UV light, if the tag will go outdoors with the plant. UMN recommends a permanent marker. Utah State also suggests keeping a simple map of each tray in case tags get lost.
- A timer. If you use electric lights, a plug-in timer keeps the schedule consistent. Our guide to choosing grow lights covers how many hours to run them and how high to hang them.
- A small fan. Utah State lists a fan as optional, noting that gentle airflow increases stem strength and helps curb diseases such as damping-off.
- Fertilizer. Seedlings need fertilizer once they develop true leaves, according to UMN and Utah State. A general-purpose, water-soluble fertilizer is enough. How and when to feed is covered in the seed-starting guide linked at the top of this article.
- Larger pots for later. UMN recommends moving seedlings that outgrow their cells into containers 1 to 2 inches wider than the cell packs.
- Floor protection. Utah State reminds gardeners to set up where water won’t damage carpet, flooring, or furniture.
What You Can Skip or Reuse
Several common purchases are optional for most home seed starters:
- Light stands and carts. Iowa State says they’re “great but are rather expensive,” and that a standard fluorescent or LED fixture is “a much cheaper alternative.” A sturdy shelf with lights hung from chains does the same job.
- Special grow lights. Utah State says simple shop lights are sufficient for seedlings.
- A heat mat in a warm room. If your mix stays around 70 to 75°F, a warm spot in the house is usually enough (Iowa State).
- High-cell-count trays. Trays with hundreds of tiny cells are built for commercial production and need specialized equipment to keep them moist (Utah State).
- New containers every season. Clean, disinfect, and reuse trays and pots (Iowa State, UMN).
Frequently Asked Questions
Do I need a heat mat to start seeds?
Not always. See the heat mat section above: it helps most for warm-season crops in a cool room.
Can I use potting soil instead of seed-starting mix?
For germination, Iowa State recommends a lightweight, pathogen-free soilless mix. It suggests a well-drained potting mix later, when seedlings move into larger pots. Avoid garden soil.
Do I need a humidity dome?
No. Clear plastic wrap or a clear bag works too (Utah State, Iowa State). See the dome section above for when to remove it.
Are peat pots worth it?
They’re most useful for crops that dislike transplanting, such as cucumbers, squash, and melons. See the peat pot section above for their drawbacks.
What size cell tray should I buy?
Utah State says 36, 48, or 72 cells per flat are common choices for home gardeners.
Getting Started
A basic seed-starting setup doesn’t take much: containers with drainage, a soilless mix, a light source, a gentle way to water, and labels. Add a dome, a timer, or a heat mat only if your space calls for it.
Before you buy, use our seed-starting calendar to find out when to sow each crop, so you know how many trays you need and when. Then see our guide on how to choose grow lights for starting seeds indoors for lighting, and our guide on how to start vegetable seeds indoors for the full process from sowing to hardening off.
Sources
- Utah State University Extension (Crump, Beddes, Caron, and Oliveira), “Starting Vegetable Seeds Indoors: II. Materials” (2025): https://extension.usu.edu/yardandgarden/research/starting-vegetable-seeds-indoors-materials
- Iowa State University Extension and Outreach (Richard Jauron), “Supplies for Starting Seeds Indoors” (reviewed December 2023): https://yardandgarden.extension.iastate.edu/how-to/supplies-starting-seeds-indoors
- Iowa State University Extension and Outreach (Sherry Rindels and Aaron Steil), “Containers for Starting Seeds” (reviewed December 2023): https://yardandgarden.extension.iastate.edu/how-to/containers-starting-seeds
- Iowa State University Extension and Outreach (Aaron Steil), “Starting Seeds in Soil Blocks” (reviewed February 2026): https://yardandgarden.extension.iastate.edu/how-to/starting-seeds-soil-blocks
- Iowa State University Extension and Outreach (Richard Jauron), “Germination Requirements for Annuals and Vegetables” (reviewed December 2023): https://yardandgarden.extension.iastate.edu/how-to/germination-requirements-annuals-and-vegetables
- Iowa State University Extension and Outreach, “Do I need to purchase a heat mat to successfully germinate seeds indoors?” (updated 2022): https://yardandgarden.extension.iastate.edu/faq/do-i-need-purchase-heat-mat-successfully-germinate-seeds-indoors
- Iowa State University Extension and Outreach (Sherry Rindels and Aaron Steil), “How to Clean and Disinfect Plant Containers” (reviewed August 2023): https://yardandgarden.extension.iastate.edu/how-to/how-clean-and-disinfect-plant-containers
- University of Minnesota Extension, “Starting seeds indoors” (reviewed 2026): https://extension.umn.edu/garden-and-home/yard-and-garden/gardening-in-minnesota/starting-seeds-indoors
- UVM Extension Master Gardener Program (Deborah J. Benoit), “Seed starting basics” (2022): https://www.uvm.edu/extension/news/seed-starting-basics
- Centers for Disease Control and Prevention, “Cleaning and Disinfecting with Bleach” (2024): https://www.cdc.gov/hygiene/about/cleaning-and-disinfecting-with-bleach.html